The development of multi-platform languages and frameworks has undergone a recent shift. This is when a single library is used to create Python Mobile Application that operate on Windows, Mac OS X, Android, and Linux.
This trend eliminates the need for programmers to rewrite the same code for a different platform. As an example, an Android developer might build a single code base that can operate on a variety of devices.
Python mobile application development follows a similar trend, allowing programmers to create cross-platform programs for a variety of operating systems and devices. As a result, apps created with this library operate on all platforms in the same way.
Python mobile application development has the benefit of giving a graphical user interface with which the developer may interact while developing the program.
The reader will learn how to set up Python mobile application development and how to create a basic application using the same library in this post. The mobile app development company will next create a graphical user interface application that allows a user to do basic age calculations quickly.
The reader will be able to grasp entry-level programming using the Python mobile application development library and design a graphical user interface utilizing components such as pictures, text, buttons, and labels as a result of the creation of this project.
Best Ways to Develop a Successful Python Mobile Application
The user will also learn how to interact with various layout components in this post.
Prerequisites
To follow along with this post, the reader should have a basic grasp of the following.
- Python is an open-source programming language.
- Python Mobile Application Development Objects and Classes
Setup of the project
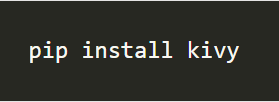
To get started, it’s helpful if you have the Python mobile application development library installed on your computer. To install Python mobile application development on your system, use the command below.
Importing a library
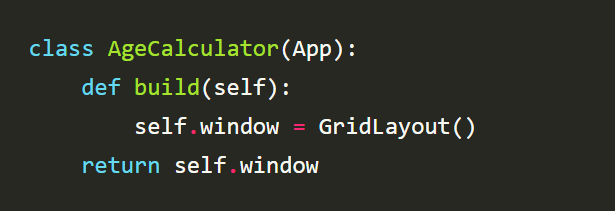
Make a calculator app folder and call it that. This is the name of the application. Create a new file called main.py in the newly created folder and paste the code below into it.

Coding the application widgets
The code above imports the component widgets that we’ll need to make the Age Calculator App.
Then, by initializing a class named Age Calculator, construct a window object for the program. Python mobile application development is built on Classes and Objects. Thus if the reader is unfamiliar with Python classes, they should review them before reading the text.
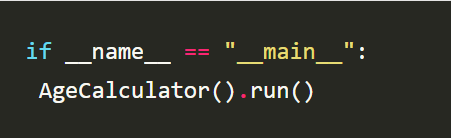
Finally, we tell the software to perform the function as soon as the file is opened.
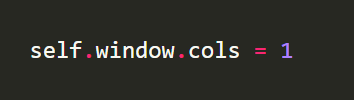
Our program needs to be styled for a more intuitive user interface and interaction. For example, we’ll start by determining the number of columns in the grid arrangement. After we’ve established complete functionality, we’ll finish off the app’s appearance.
Using the code below, we’ll create a logo for our application. Save the program’s logo in the same directory as the main.py file so that it may be readily found by the application.

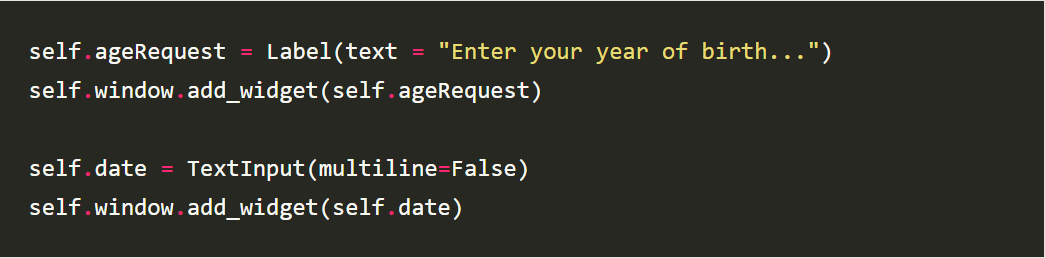
We need to create an input where the user may enter their date of birth and name it “enter your date of birth” because this program wants to discover the user’s age when they supply their date of birth.
Getting feedback from users
Let’s create an application that connects the date of birth input from the user.

Bind the function to compute age to the button
We need to link the calculate-age callback function to the button so that when the Compute Age button is pressed, the getAge function is invoked to calculate the age based on the year of birth entered.

Determine the age function
This function subtracts the year of birth entered from the current year. We take the year component of the DateTime Python package and extract it.
In addition, we construct a uniform data type by converting the user input year from a string to an integer. Finally, we display the result to the user by converting it to a string.

The user interface (UI) of the program is being styled.
To properly design our application, we may start by adding margins to the sides and bottom. The space around a certain application component is referred to as the margin.
The margin will be the space around the container layout in our scenario. Following that, we use the code snippet below to experiment with all of the other components of the program.
Another benefit of the module is that the produced application adapts to screen size automatically and provides a clear outline of the treated screen size.

Activating the program
To execute the program, open a terminal window and go to the project directory. Then, in the project directory, run the command below.